Next.jsをゼロからマスターする Part 7
前置き
今回の第7回は、v0.devというAIでコードを自動生成するサービスを使ってNext.jsのコンポーネントを自動で作成し、そのコンポーネントをNext.jsプロジェクトで表示させる手順を解説します。
v0のサービスを使う事前準備として、Next.jsのプロジェクト作成と、shadcn/uiの導入を行います。
Next.jsのプロジェクト作成
Next.jsのプロジェクト作成の手順を説明します。
- コマンドラインツール(ターミナルやコマンドプロンプト)を開きます。
- プロジェクトを作成したいディレクトリに移動します。
- 以下のコマンドを実行して、新しいNext.jsプロジェクトを作成します。
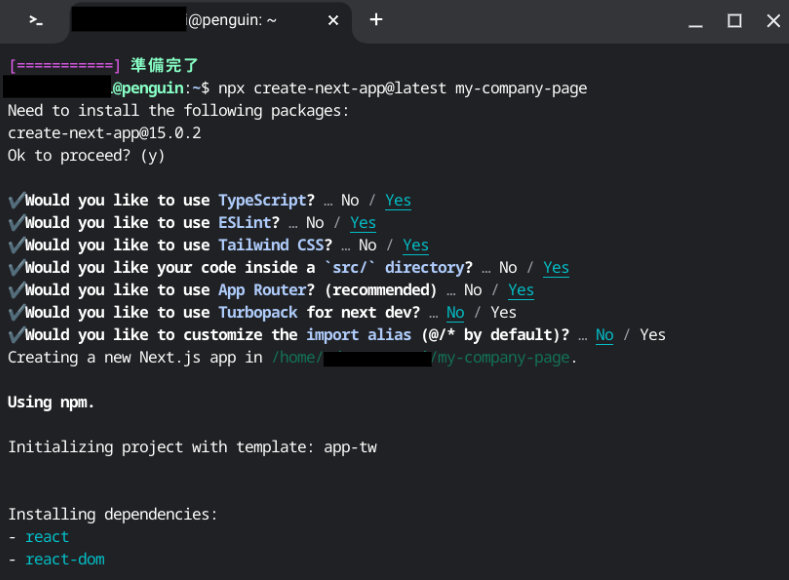
npx create-next-app@latest my-company-page
ここで、”my-shadcnui-app”はあなたのプロジェクト名です。好きな名前に変更できます。
- プロジェクト作成中に表示される設定オプションに答えます。TypeScriptを使用するかどうかなど、いくつかの質問があります。
注意: Next.jsのバージョン15.0.2を使用して、プロジェクトを作成した場合の事例です。バージョンが異なると、これらのステップが異なる場合があります。
| ステップ | 回答例 (デフォルト) |
|---|---|
| Need to install the following packages: create-next-app@15.0.2 Ok to proceed? (y) | Returnボタン |
| ?Would you like to use TypeScript?› No / Yes | Yesを選択 |
| ?Would you like to use ESLint?› No / Yes | Yesを選択 |
| ? Would you like to use Tailwind CSS? › No / Yes | Yesを選択 |
| ?Would you like to use src/directory?› No / Yes | Yesを選択 |
| ? Would you like to use Turbopack for next dev? › No / Yes | Noを選択 |
| ?Would you like to customize the default import alias (@/*)?› No / Yes | Noを選択 |
VSCode開き、File ⇨ Open Folder ⇨ my-company-pageを開きます。
VSCodeのショートカット「Ctr + `(バッククォート)」または、Terminal ⇨ New Terminalでターミナルを開いて、「npm run dev」を実行しサーバーを立ち上げます。
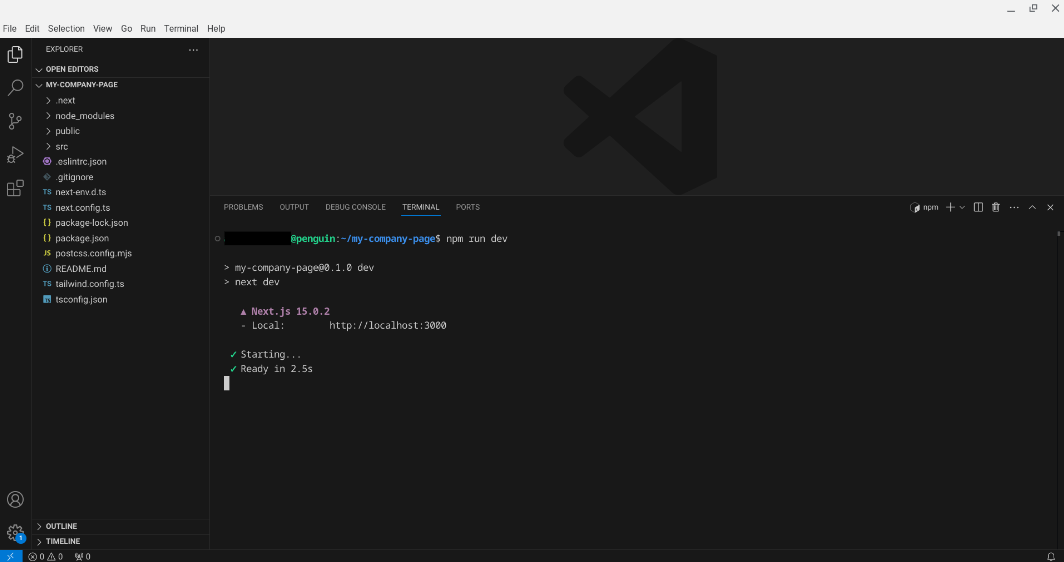
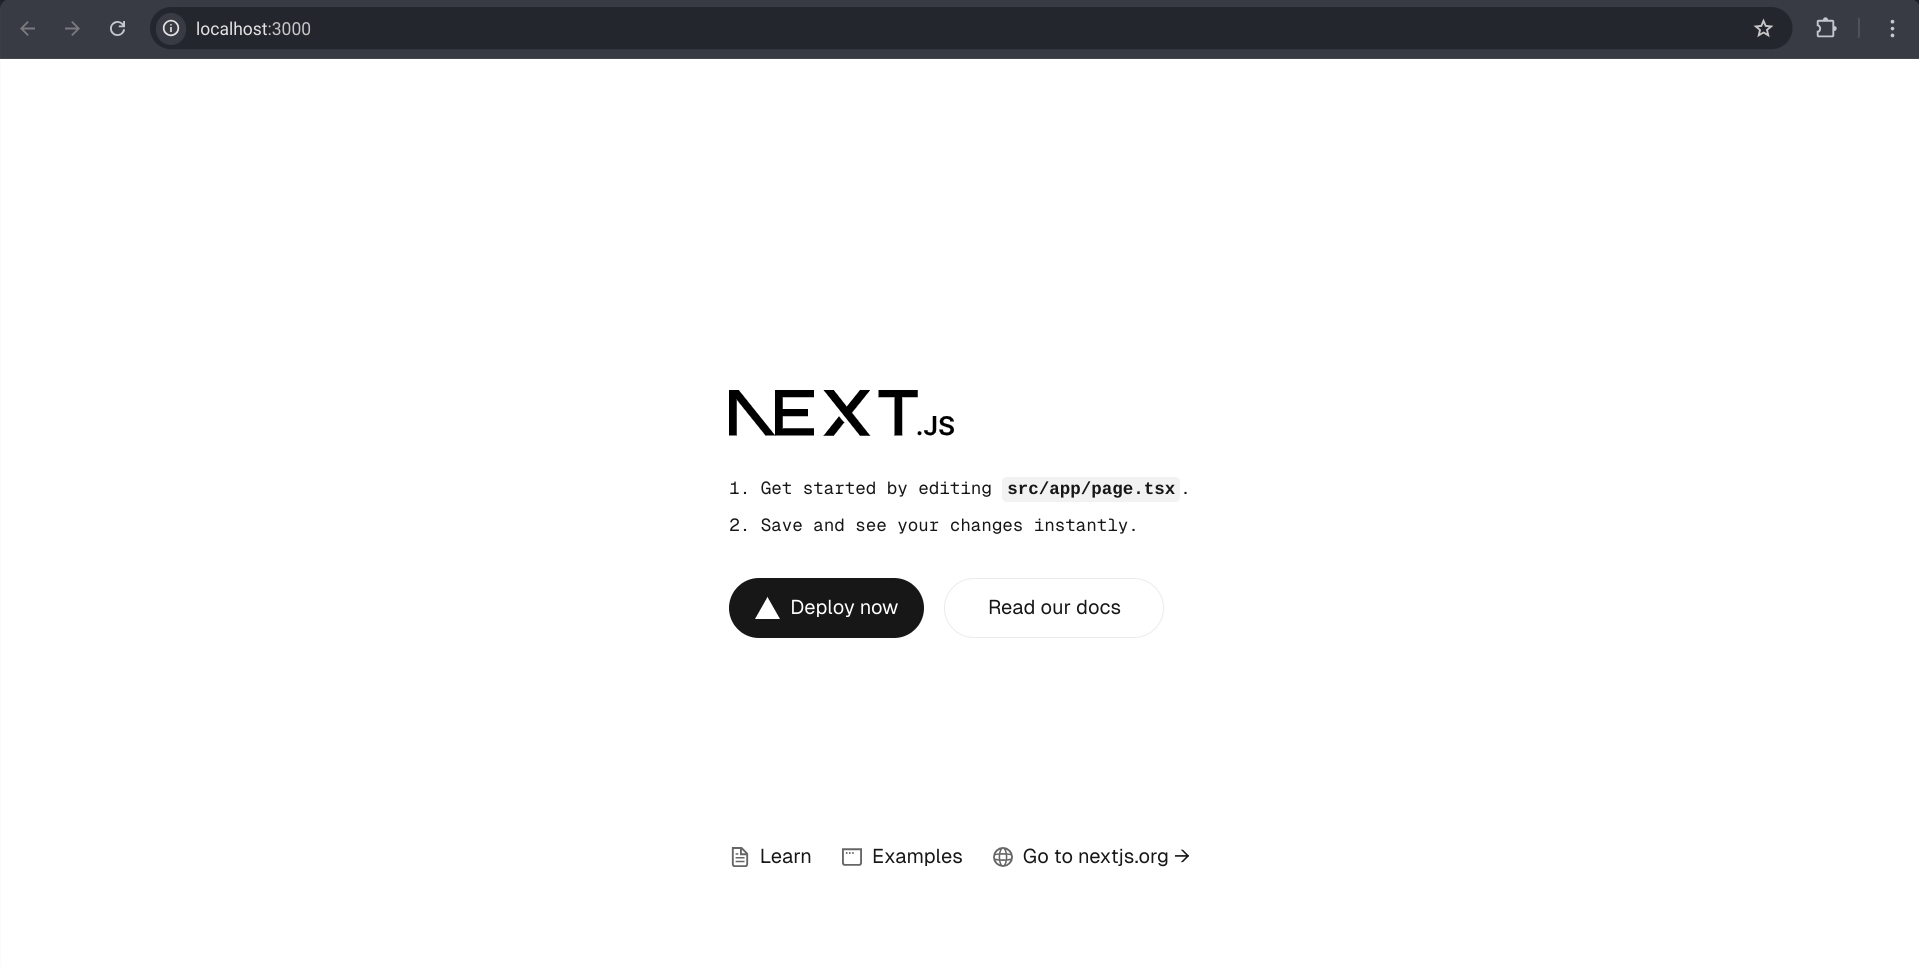
Webブラウザで、URL:http://localhost:3000 にアクセスして、Next.jsのサーバーが確認できれば、プロジェクトの作成に成功しています。
srcフォルダの下にcomponentsフォルダを作成
srcフォルダの下にcomponentsフォルダを作成します。
「VSCodeにあるフォルダー作成から」または、「VSCodeでコマンドラインを開いて、 mkdir コマンドで components フォルダを作成」してください。
- VSCodeのショートカット「Ctr + `(バッククォート)」または、Terminal ⇨ New Terminalからターミナルを開きます。
- cd コマンドでsrcディレクトリへ移動します。
cd src
- mkdir コマンドで、 componentsディレクトリを作成します。
mkdir components
プロジェクト構成のツリー図を以下に示します。
my-project/
├── src/
│ ├── app/
│ │ ├── layout.tsx
│ │ └── page.tsx
│ ├── components/ <— src(source)フォルダの下に、追加でcomponets/フォルダを作成した
│ ├── lib/
│ └── styles/
├── public/
├── package.json
├── tsconfig.json
└── next.config.js
この構成について解説します。
- src/: ソースコードのルートディレクトリ。アプリケーションのメインコードはここに配置されます。
- src/app/: App Routerのルートディレクトリ。ページやレイアウトファイルが含まれます。
- src/components/: 再利用可能なReactコンポーネントを格納するディレクトリ。
- src/lib/: ユーティリティ関数や共通ロジックを格納するディレクトリ。
- src/styles/: グローバルスタイルやCSSモジュールを格納するディレクトリ。
- public/: 静的ファイル(画像、フォントなど)を格納するディレクトリ。
shadcn/uiの導入手順
shadcn/uiの公式ページは以下のURLでアクセスできます。
このページでは、shadcn/uiの詳細な情報、使用方法、および利用可能なコンポーネントについて確認できます。
Next.js 14プロジェクトにshadcn/uiを導入する手順を以下に説明します。
参考: shadcn/uiのドキュメント Installation > Next.js ( https://ui.shadcn.com/docs/installation/next )
- 作成したプロジェクトのルートディレクトリに移動します。
cd my-company-page
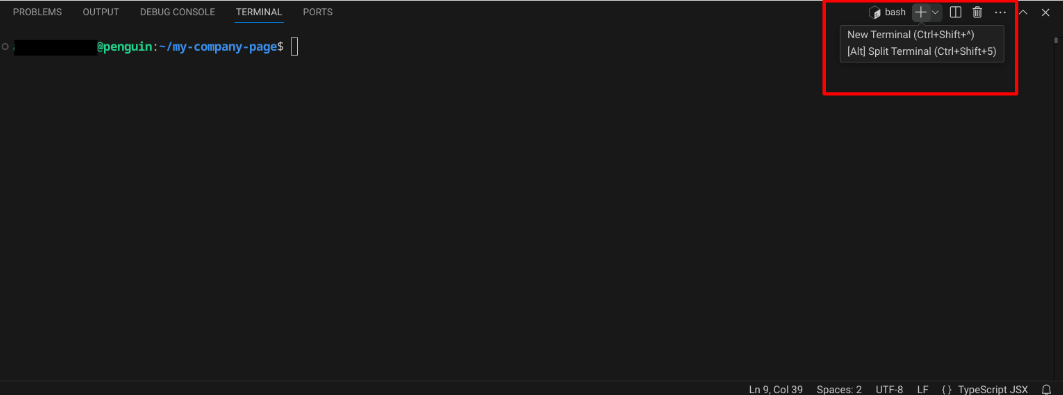
※開発サーバーが立ち上がったままTerminalを使い続けるには、右上の「+」マークをクリックして新しいタブを開きます。これにより、別の作業を同時に行うことができます。
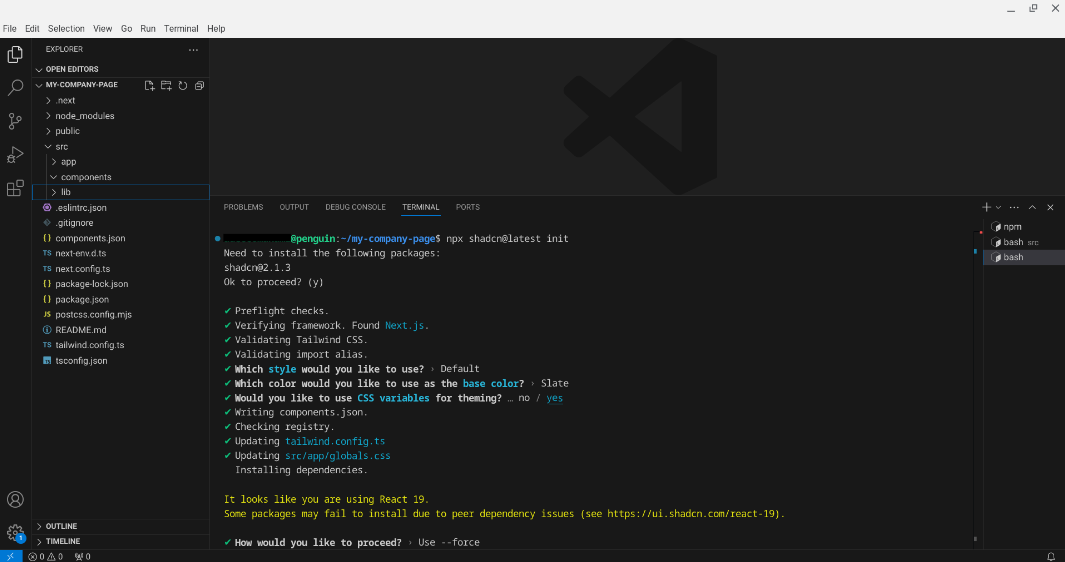
- shadcn/uiのCLIをインストールします。
npx shadcn@latest init
- CLIの設定質問に答えます。以下は例です。
| Which style would you like to use? › | Default |
| Which color would you like to use as base color? › | Slate |
| Would you like to use CSS variables for theming? | Yes |
※?How would you like to proceed?と質問が表示されます。デフォルトでUse – – forceならUse – – forceのままで良いです。
これらの手順を完了すると、Next.js 14プロジェクトにshadcn/uiが導入され、使用可能になります。
v0.devの紹介
v0.devは、Vercelが提供するAI駆動のUIデザインツールです。
このツールを使用すると、自然言語の説明からReactコンポーネントを生成できます。
以下に、v0.devの使用方法と具体例を示します。
v0.devの利点
- 迅速なプロトタイピング:アイデアを素早くビジュアル化できます。
- コード生成の効率化:基本的なコンポーネント構造を自動生成します。
- デザインの一貫性:Tailwind CSSとshadcn/uiを使用して、一貫したスタイルを維持します。
- 学習ツールとしての活用:生成されたコードから、ベストプラクティスを学ぶことができます。
v0.devを使用することで、UIコンポーネントの開発プロセスを大幅に効率化し、デザインの一貫性を保ちながら、迅速にプロトタイプを作成することができます。
v0.devの使用手順
- v0.devのウェブサイト(https://v0.dev)にアクセスします。
- Githubアカウントを使ってv0.devにログインするために、Webブラウザの別タブでGithub(https://github.com/)にログインしておきます。
- v0.devにログインするのが初めての場合は、Sign Up ボタンを押して、Githubアカウントを使ってログインしてください。
- ログインできたら、プロンプト入力欄に、作成したいUIコンポーネントの説明を入力します。
- AIが生成したコードとプレビューを確認します。
- 必要に応じて、プロンプトを調整して再生成します。
- 満足のいく結果が得られたら、生成されたコードをコピーして自分のプロジェクトで使用します。
具体例:ダッシュボードカードの生成
以下のプロンプトを使用して、企業のホームページを生成してみましょう。
プロンプトには日本語も使用できます。
Create a responsible company landing page
v0.devが生成する可能性のあるコードの例
import { Button } from “@/components/ui/button”
import { Input } from “@/components/ui/input”
import { Leaf, Users, Recycle, ChevronRight } from “lucide-react”
import Image from “next/image”
import Link from “next/link”
export default function ResponsibleLanding() {
return (
<div className=”flex flex-col min-h-screen”>
<header className=”px-4 lg:px-6 h-14 flex items-center”>
<Link className=”flex items-center justify-center” href=”#”>
<Leaf className=”h-6 w-6 text-green-600″ />
<span className=”sr-only”>EcoTech Solutions</span>
</Link>
<nav className=”ml-auto flex gap-4 sm:gap-6″>
<Link className=”text-sm font-medium hover:underline underline-offset-4″ href=”#mission”>
Our Mission
</Link>
<Link className=”text-sm font-medium hover:underline underline-offset-4″ href=”#initiatives”>
Initiatives
</Link>
<Link className=”text-sm font-medium hover:underline underline-offset-4″ href=”#join-us”>
Join Us
</Link>
</nav>
</header>
<main className=”flex-1″>
<section className=”w-full py-12 md:py-24 lg:py-32 xl:py-48 bg-green-100″>
<div className=”container px-4 md:px-6″>
<div className=”flex flex-col items-center space-y-4 text-center”>
<div className=”space-y-2″>
<h1 className=”text-3xl font-bold tracking-tighter sm:text-4xl md:text-5xl lg:text-6xl/none”>
Innovating for a Sustainable Future
</h1>
<p className=”mx-auto max-w-[700px] text-gray-600 md:text-xl”>
At EcoTech Solutions, we’re committed to developing technologies that protect our planet and empower communities.
</p>
</div>
<div className=”space-x-4″>
<Link href=”#join-us”>
<Button>Join Our Mission</Button>
</Link>
<Link href=”#initiatives”>
<Button variant=”outline”>Learn More</Button>
</Link>
</div>
</div>
</div>
</section>
<section id=”mission” className=”w-full py-12 md:py-24 lg:py-32″>
<div className=”container px-4 md:px-6″>
<div className=”grid gap-6 lg:grid-cols-[1fr_400px] lg:gap-12 xl:grid-cols-[1fr_600px]”>
<Image
alt=”Diverse team working on sustainable solutions”
className=”mx-auto aspect-video overflow-hidden rounded-xl object-cover object-center sm:w-full lg:order-last”
height=”550″
src=”/placeholder.svg?height=550&width=550″
width=”550″
/>
<div className=”flex flex-col justify-center space-y-4″>
<div className=”space-y-2″>
<h2 className=”text-3xl font-bold tracking-tighter sm:text-4xl”>Our Mission</h2>
<p className=”max-w-[600px] text-gray-600 md:text-xl/relaxed lg:text-base/relaxed xl:text-xl/relaxed”>
We believe in harnessing the power of technology to create a more sustainable and equitable world. Our mission is to develop innovative solutions that address climate change, promote renewable energy, and foster social responsibility.
</p>
</div>
<ul className=”grid gap-2 py-4″>
<li className=”flex items-center gap-2″>
<ChevronRight className=”h-4 w-4 text-green-600″ />
<span>Reducing carbon footprint through smart technologies</span>
</li>
<li className=”flex items-center gap-2″>
<ChevronRight className=”h-4 w-4 text-green-600″ />
<span>Promoting renewable energy adoption worldwide</span>
</li>
<li className=”flex items-center gap-2″>
<ChevronRight className=”h-4 w-4 text-green-600″ />
<span>Empowering communities with sustainable solutions</span>
</li>
</ul>
</div>
</div>
</div>
</section>
<section id=”initiatives” className=”w-full py-12 md:py-24 lg:py-32 bg-gray-100″>
<div className=”container px-4 md:px-6″>
<h2 className=”text-3xl font-bold tracking-tighter sm:text-4xl md:text-5xl text-center mb-8″>Our Key Initiatives</h2>
<div className=”grid gap-6 sm:grid-cols-2 lg:grid-cols-3″>
<div className=”flex flex-col items-center space-y-2 border-gray-200 p-4 rounded-lg bg-white shadow-sm”>
<Leaf className=”h-10 w-10 text-green-600″ />
<h3 className=”text-xl font-bold”>Green Energy Solutions</h3>
<p className=”text-sm text-gray-600 text-center”>Developing cutting-edge renewable energy technologies to power a cleaner future.</p>
</div>
<div className=”flex flex-col items-center space-y-2 border-gray-200 p-4 rounded-lg bg-white shadow-sm”>
<Users className=”h-10 w-10 text-blue-600″ />
<h3 className=”text-xl font-bold”>Community Empowerment</h3>
<p className=”text-sm text-gray-600 text-center”>Creating programs that educate and enable communities to adopt sustainable practices.</p>
</div>
<div className=”flex flex-col items-center space-y-2 border-gray-200 p-4 rounded-lg bg-white shadow-sm”>
<Recycle className=”h-10 w-10 text-purple-600″ />
<h3 className=”text-xl font-bold”>Circular Economy</h3>
<p className=”text-sm text-gray-600 text-center”>Innovating in recycling and upcycling to minimize waste and maximize resource efficiency.</p>
</div>
</div>
</div>
</section>
<section id=”join-us” className=”w-full py-12 md:py-24 lg:py-32″>
<div className=”container px-4 md:px-6″>
<div className=”flex flex-col items-center space-y-4 text-center”>
<div className=”space-y-2″>
<h2 className=”text-3xl font-bold tracking-tighter sm:text-4xl md:text-5xl”>Join Our Mission</h2>
<p className=”mx-auto max-w-[600px] text-gray-600 md:text-xl/relaxed lg:text-base/relaxed xl:text-xl/relaxed”>
Be part of the change. Sign up for our newsletter to stay updated on our latest initiatives and how you can contribute to a sustainable future.
</p>
</div>
<div className=”w-full max-w-sm space-y-2″>
<form className=”flex flex-col gap-2 min-[400px]:flex-row”>
<Input className=”max-w-lg flex-1″ placeholder=”Enter your email” type=”email” />
<Button type=”submit”>Subscribe</Button>
</form>
<p className=”text-xs text-gray-600″>
By subscribing, you agree to our{” “}
<Link className=”underline underline-offset-2″ href=”#”>
Terms & Conditions
</Link>
.
</p>
</div>
</div>
</div>
</section>
</main>
<footer className=”flex flex-col gap-2 sm:flex-row py-6 w-full shrink-0 items-center px-4 md:px-6 border-t”>
<p className=”text-xs text-gray-600″>© 2024 EcoTech Solutions. All rights reserved.</p>
<nav className=”sm:ml-auto flex gap-4 sm:gap-6″>
<Link className=”text-xs hover:underline underline-offset-4″ href=”#”>
Terms of Service
</Link>
<Link className=”text-xs hover:underline underline-offset-4″ href=”#”>
Privacy
</Link>
</nav>
</footer>
</div>
)
}
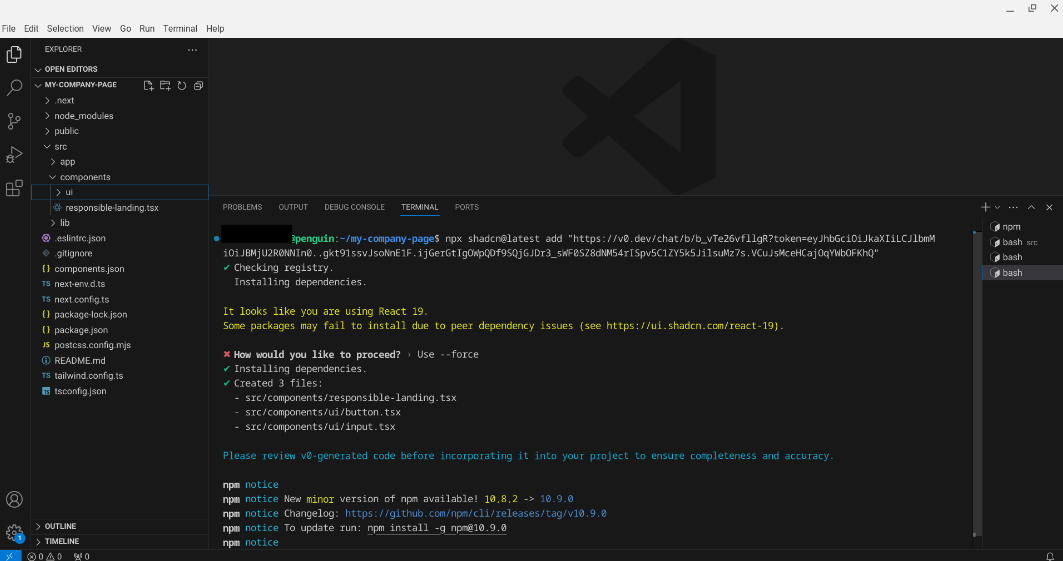
v0.devに表示された右上のAdd to Codebaseアイコンボタンを押して、表示されたコマンドをコピーし、VSCodeのコマンドラインを開いて実行してください。
npx shadcn@latest add “https://v0.dev/chat/b/b_UZrvQ2pReYk?token=eyJhbGciOiJkaXIiLCJlbmMiOiJBMjU2R0NNIn0..25Mjwta_AlV47quz.8WFwdw-IFBdUtpDYe_gNjROf8SwAKQsOIVX40y3iytNxeqGV6-cTXZTkiOE._2jhJpcsw6XAidharfNcsA”
上記のコマンドを入力すると、?How would you like to proceed?と質問が表示されます。
デフォルトでUse – – forceならUse – – forceのままで良いです。

そうすると、 src/components ディレクトリに v0.devで作成したコンポーネントをインポートすることができます。また、 src/components/ui ディレクトリが作成され、必要なshadcn/uiのコンポーネントも自動で追加されます。
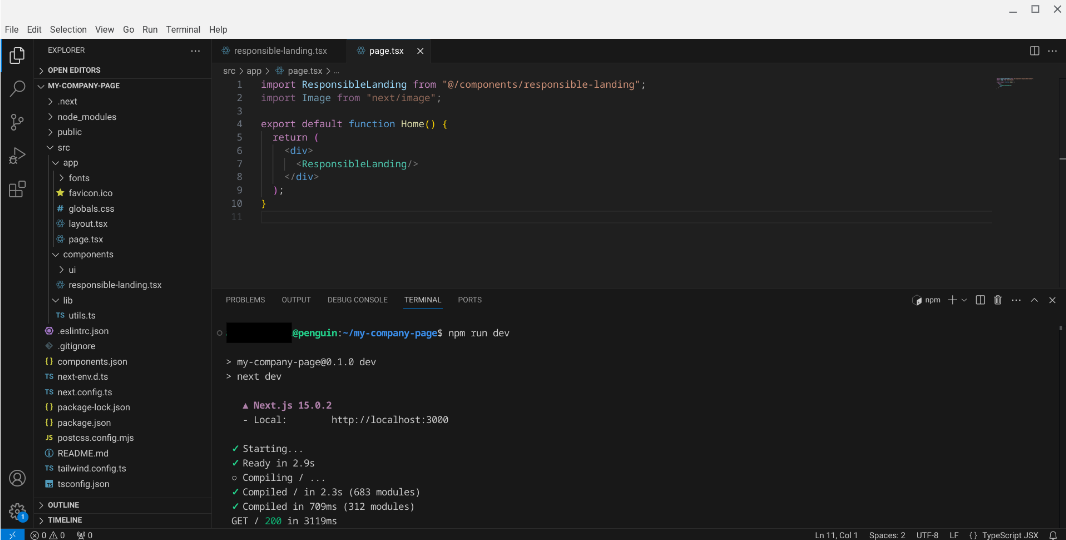
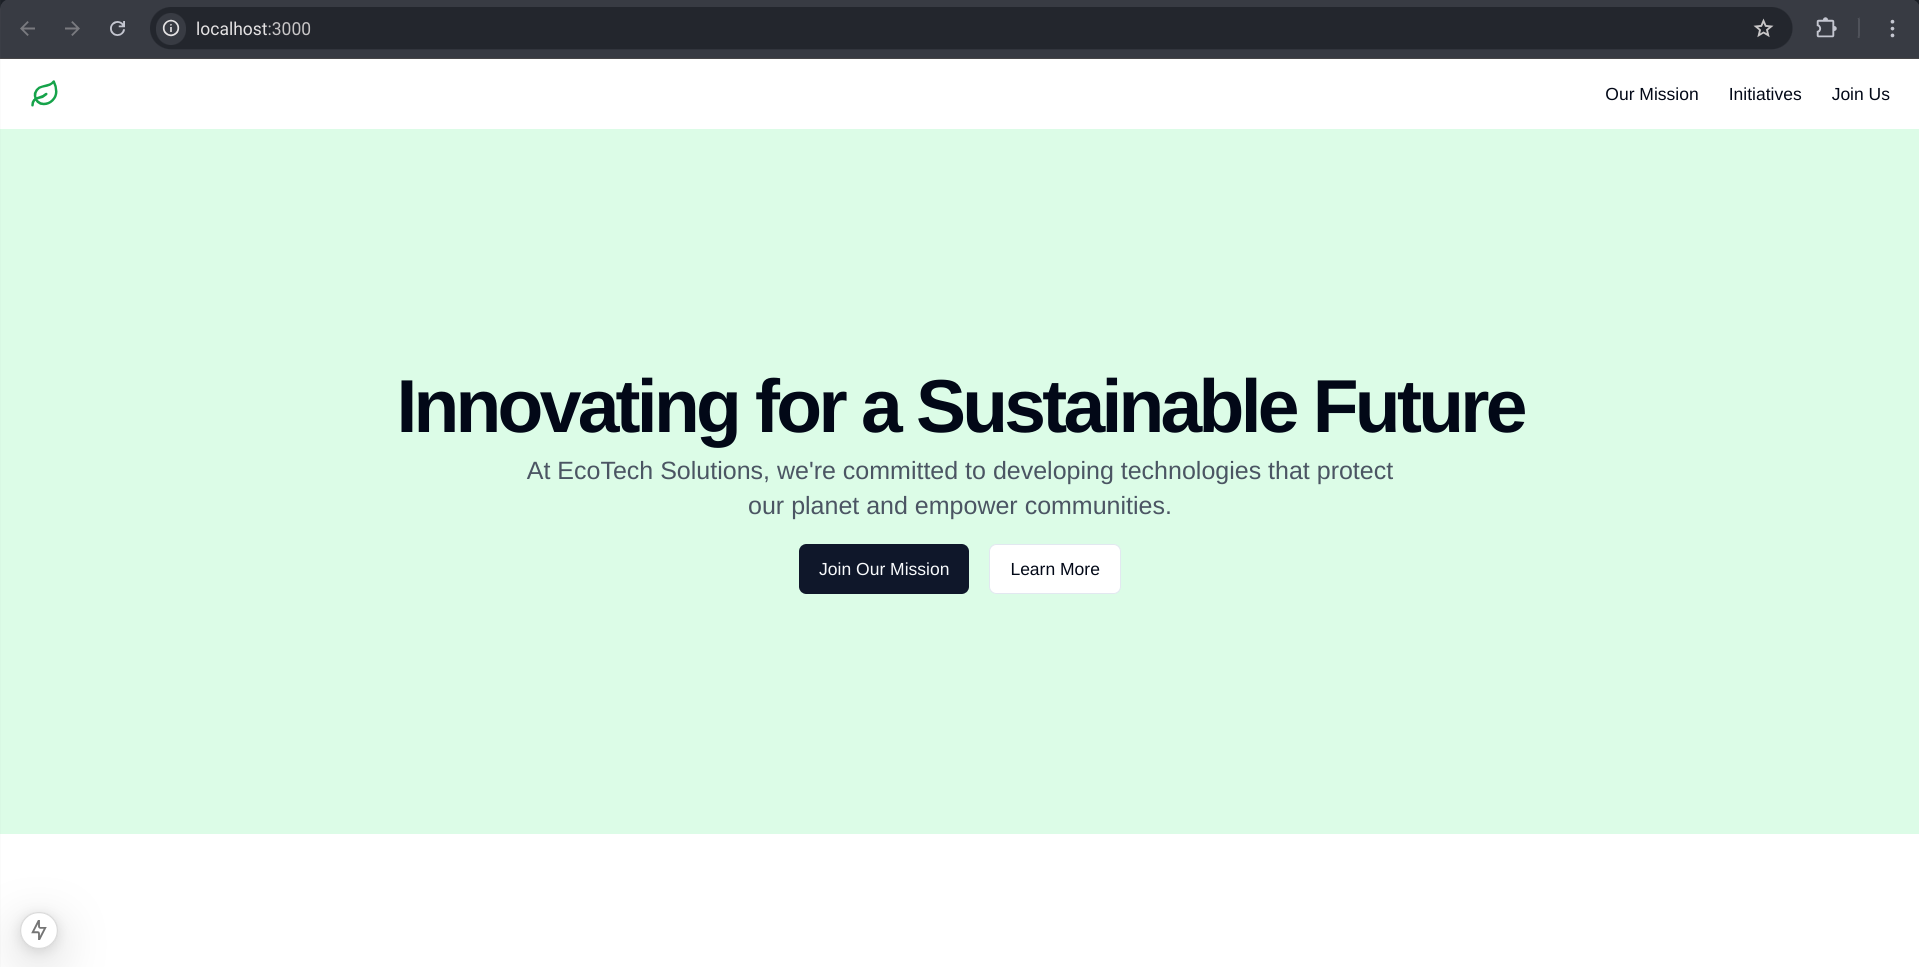
ResponsibleLandingを表示する
- responsible-landing.tsxに記載されているexport default function ResponsibleLanding( )から「ResponsibleLanding」の部分をコピーします。
- src/app/page.tsxのreturn文以降の部分を削除します。
- 「ResponsibleLanding」をreturn文の後ろに貼り付けます。この際、エラーが表示される場合は、エラー部分にマウスを当てて「QUICK Fix」を選択します。
- エラーがすべて消えたら、変更を保存します。その後、Terminalを立ち上げて「npm run dev」と入力し、ブラウザでURL:https://localhost:3000にアクセスします。
画像ファイルをNext.jsのImageタグで表示する方法
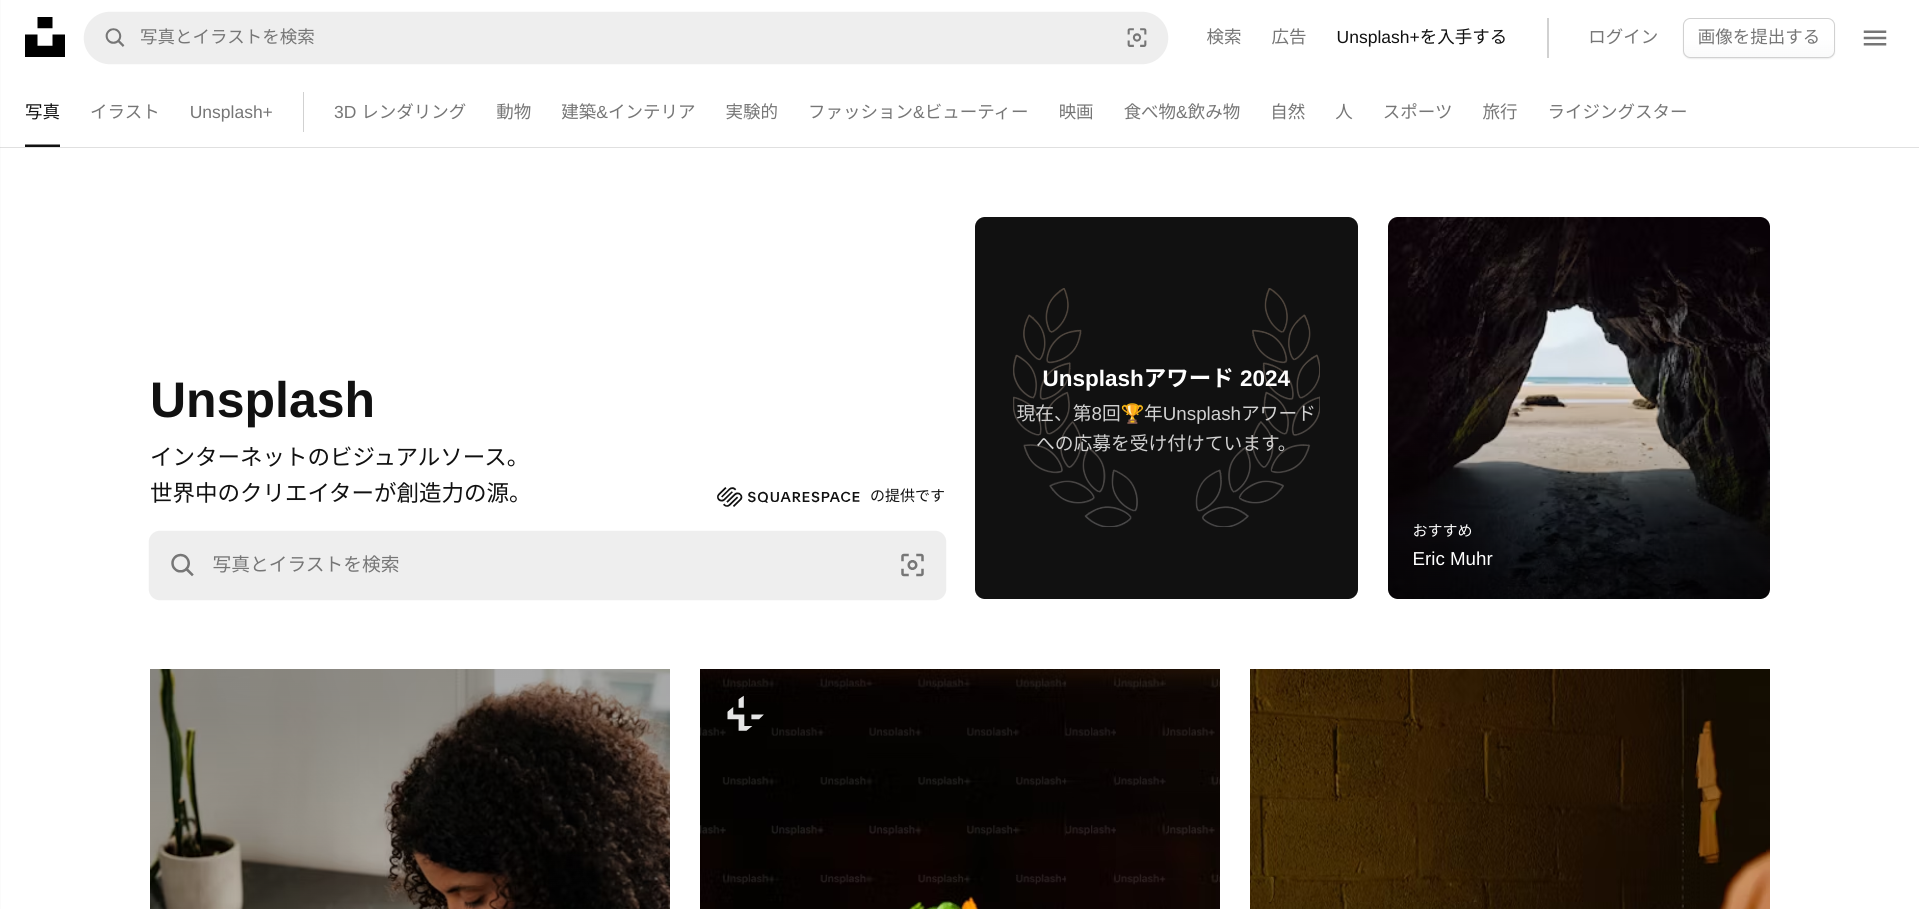
Unsplashから画像をダウンロードし、Next.jsプロジェクトで表示する方法を説明します。
- Unsplashから画像をダウンロード: Unsplashにアクセスし、使用したい画像を見つけてダウンロードします。
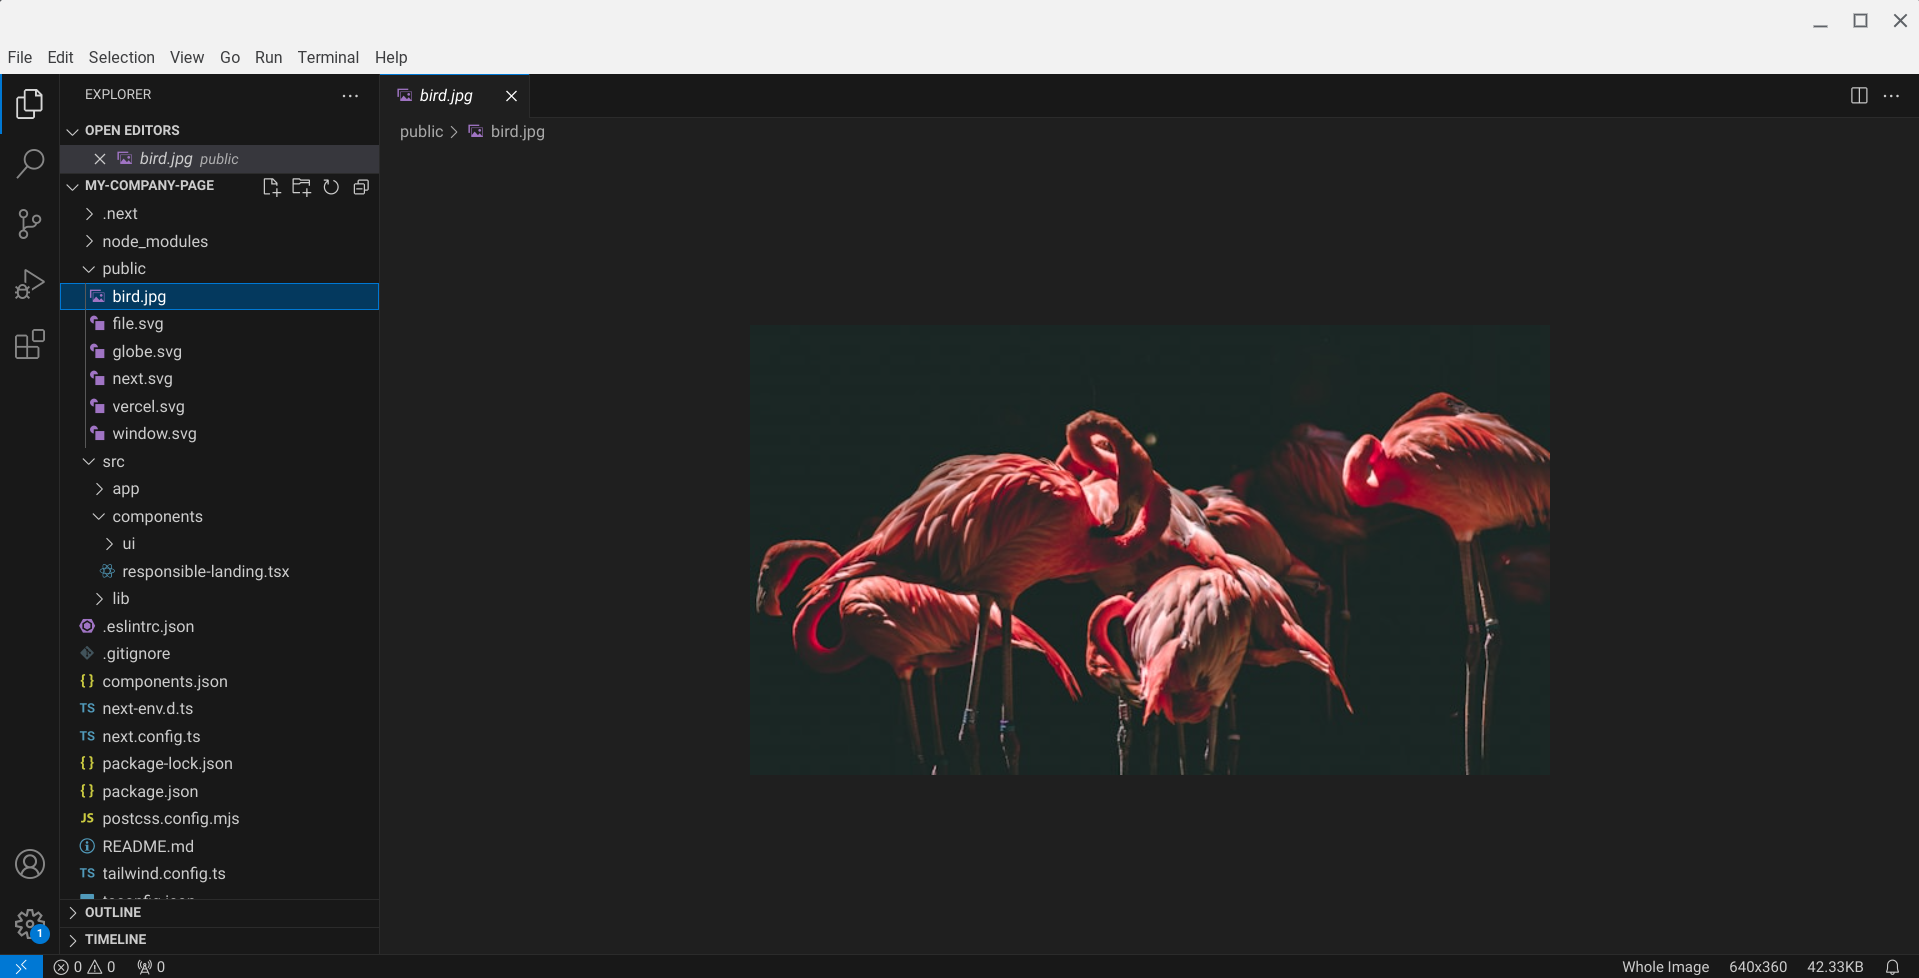
- publicディレクトリの作成: Next.jsプロジェクトのルートディレクトリに「public」というフォルダを作成します(まだ存在しない場合)。[参考: https://nextjs.org/docs/getting-started/installation#the-public-folder-optional]
- 画像の配置: ダウンロードした画像を「public」フォルダ内に配置します。
例:「public/my-image.jpg」
- Imageコンポーネントのインポート: 画像を表示したいコンポーネントファイルの先頭に以下の行を追加します。
import Image from ‘next/image’;
- 画像の表示: コンポーネント内で以下のようにImageコンポーネントを使用して画像を表示します。
<Image
src=”/my-image.jpg”
alt=”Description of the image”
width={500}
height={300}
/>
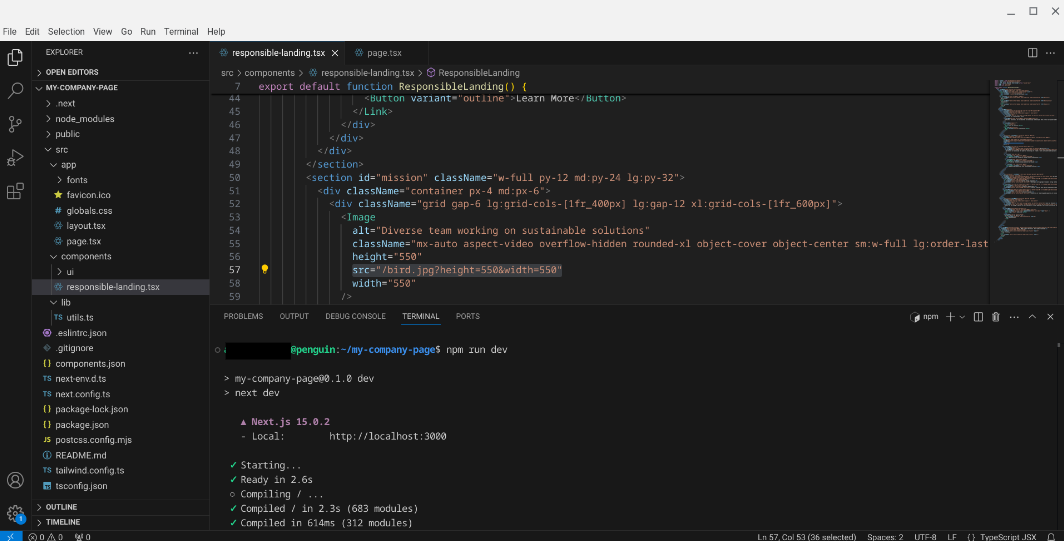
ここで、widthとheightは画像の元のサイズに応じて適切な値に調整してください。
注意点
- 画像のパスは「/」から始まり、「public」フォルダを基準とします。
- altテキストは必ず指定し、画像の内容を適切に説明してください。
- widthとheightプロパティは、画像のアスペクト比を維持するために重要です。
これらの手順に従うことで、Unsplashからダウンロードした画像をNext.jsプロジェクトで簡単に表示することができます。
publicディレクトリの下に保存したイメージファイルなどのアセットファイルは、 / のパスでアクセスできます。参考: https://nextjs.org/docs/pages/building-your-application/optimizing/static-assets